We are all set to create our First Hello World Project using LWC .Before creating this let’s make sure you completed the Install Developer Tools for LWC development section so that you are ready with the setup.
Steps to create a Lightning Web Component
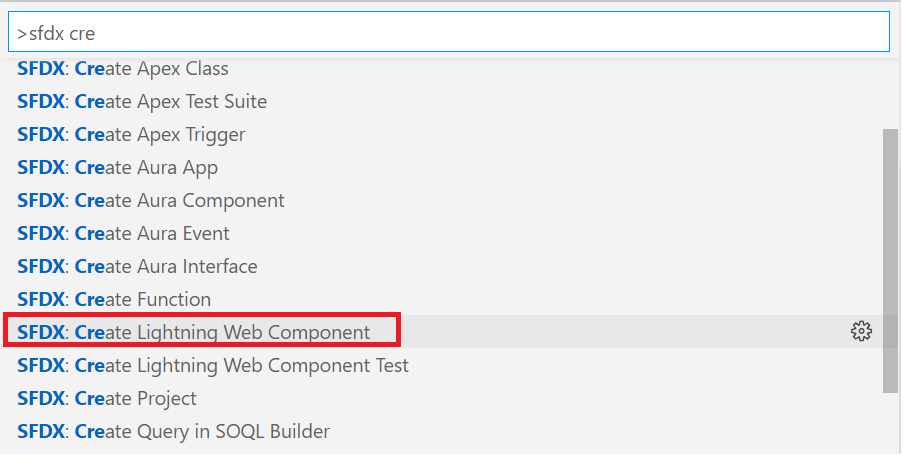
1.In VS Code, open the Command Palette by pressing Ctrl+Shift+P on Windows.
2. Type SFDX and Select SFDX: Create Lightning Web Component.
3. Type helloWorld as the name of the new component and press Enter.
As naming convention, we should use camel case to name the LWC component like helloWorld.
4. Press Enter to accept the default force-app/main/default/lwc.
5. Navigate to your lwc folder, you will see one new component with the name helloWorld gets created.
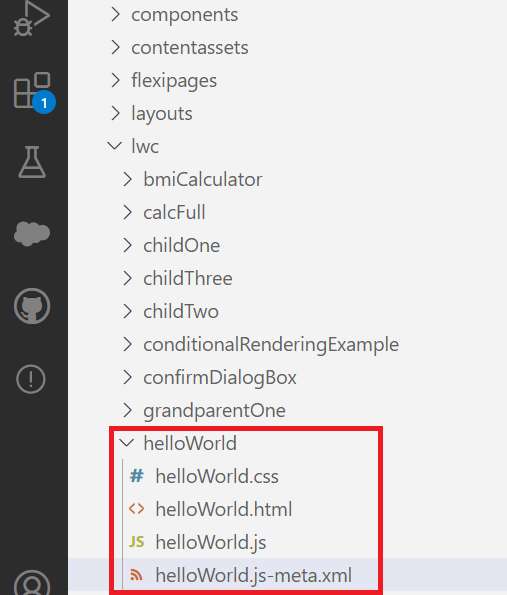
Fig: Hello world component
6. If you see the helloWorld component. It has three files:
- helloWorld.html – This file contains your component HTML. Every UI Component must have an HTML file with the root tag <template>
- helloWorld.js – This file defines our component and helps to bind the data to the UI. The class name should always be Pascal Case i.e., the first letter of each word is capitalized.
- helloWorld.js-meta.xml – This configuration file defines the metadata values for the component. Also, we specify which type of lightning page this component can be added.
Html, js and meta.xml file is mandatory for any component. There are other optional files like css, extra js file test file, SVG icon you can add to the component based on your requirement.
Add the following code to the corresponding file of your project. We will go through it’s meaning one by one later:
helloWorld.html
<template>
    <lightning-card title="Hello World LWC">
        <div class="greeting-class">Hello {dynamicGreeting}</div>
        <div> Styling with element tag name</div>

     <lightning-input label="Greeting" onchange={greetingChangeHandler}></lightning-input>
    </lightning-card>
</template>
helloWorld.js
/*
* @description: hello world component
* @author: sfdc4u.com
*/

import { LightningElement,track} from 'lwc';

export default class HelloWorld extends LightningElement {
   @track dynamicGreeting='World';

   greetingChangeHandler(event){
     this.dynamicGreeting = event.target.value;
   }
}
helloWorld.js-meta.xml
<?xml version="1.0" encoding="UTF-8"?>
<LightningComponentBundle xmlns="http://soap.sforce.com/2006/04/metadata">
    <apiVersion>48.0</apiVersion>
    <isExposed>true</isExposed>
    <targets>
        <target>lightning__AppPage</target>
        <target>lightning__RecordPage</target>
        <target>lightning__HomePage</target>
    </targets>
</LightningComponentBundle>
Deploy helloWorld component to Dev Org
- Right-click the default folder.
- Click SFDX: Deploy Source to Org from the options
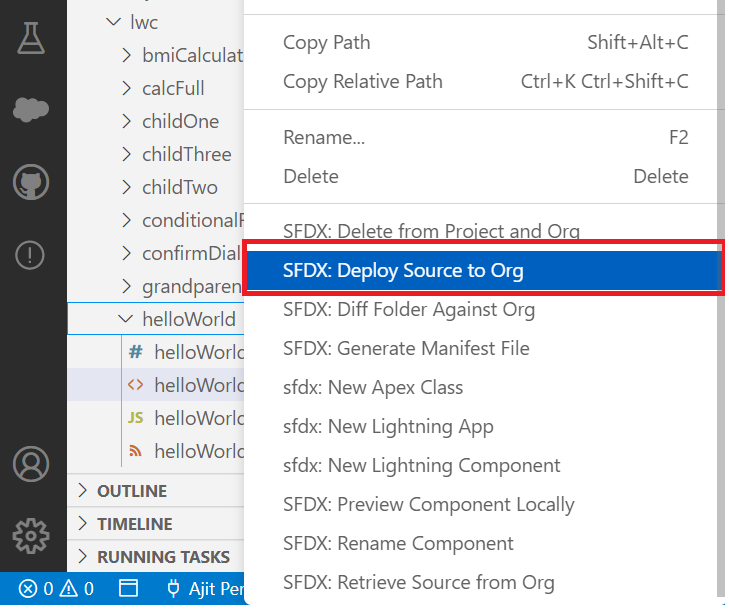
fig: Deploy To Source
3. In the Output tab of the integrated terminal, view the results of your deployment. You should have also received a notice that states: SFDX: Deploy Source to Org … ended with exit code 0. This means that the command ran successfully.
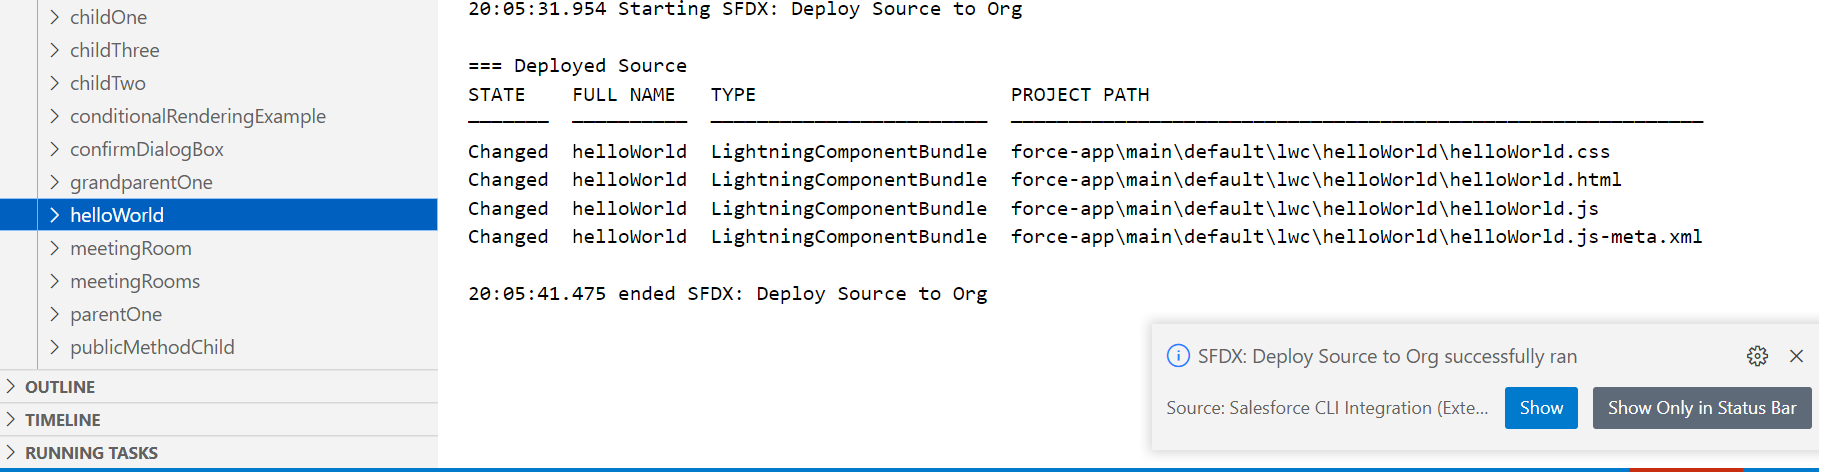
fig: Successful Deploy
Add Component to Sales App in Lightning Experience
- In VS Code, open the Command Palette by pressing Ctrl+Shift+P on Windows .
- Type SFDX and Select Select SFDX: Open Default Org
- Click the app launcher icon it will open the App Launcher, then click Sales.
- Once Sales app is opened, Click the gear icon shown in the top right corner, then click Edit Page. It will open the Lightning App Builder
- Drag the helloWorld Lightning web component from the list of custom components to the top of the Page Canvas and Click Save.
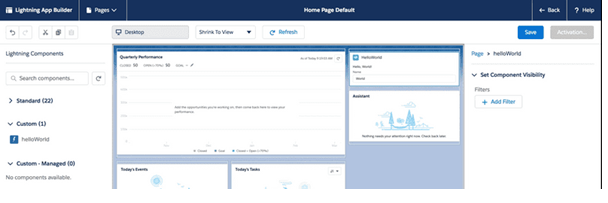
fig: Placing component in the Builder
6. Click Activate.
7. Click Assign as Org Default and then click Save
8. Click Save again, then click Back to return to the Home page.
9. Refresh the page to view your new component.
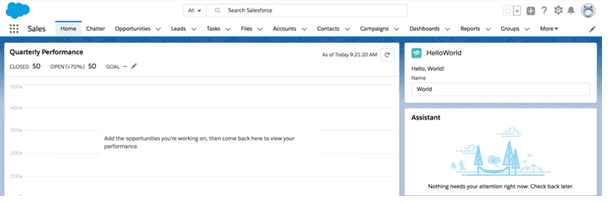
fig: Final Output
10 . Hurray!! We have finally developed our first Lightning web component!
Naming convention for folder and its files:
- It must begin with a lowercase letter
- It must contain only alphanumeric or underscore characters
- It must be unique in the namespace
- It Should not contain whitespace
- It should not end with an underscore
- It should not contain two consecutive underscores
- It should not contain a hyphen (dash)
- Use camel case (each word or abbreviation in the middle of the phrase begins with a capital letter, with no intervening spaces or punctuation) to name a component. e.g. helloWorld.
- Camel case component folder names map to kebab-case in markup. e.g. <c-hello-world> where c is the default namespace.
- An HTML File, a JavaScript File & a Configuration File should be present in Lightning Web Component. Css File and Other JavaScript file can be optional.
- Separate Controller, Helper & Renderer files in Aura Component is equivalent to one JavaScript file in LWC.
Reference : First Hello World project in LWC
Read more: Data binding in LWC
1 thought on “Chapter 4: First Hello World Project using LWC”