Data binding in LWC is the synchronization between the controller and the template (HTML).
Data binding is done using a combination of JavaScript and HTML template expressions which are enclosed in curled braces ({}) in the HTML template.
These expressions are evaluated by the LWC engine, and their results are inserted into the template. For e.g.- to display the value of a component’s firstName property in the template, we use expression {firstName}.
There are two types of data binding:
- One-Way Data Binding
- Two-Way Data Binding
One-Way Data Binding

LWC is designed with a one-way data binding approach.
One way binding follows from controller to view but vice versa is not possible.
Example Code:
oneWayDataBinding.html
<template>

    <div class="slds-m-top_medium slds-m-bottom_x-large">

        <h2 class="slds-text-heading_medium slds-m-bottom_medium">

            A text input field with an initial value.

        </h2>

        <div class="slds-p-around_medium lgc-bg">

            <lightning-input type="text" label="Enter first name" value={firstName}></lightning-input>

            <h2 class="slds-badge slds-m-top_small">

                Entered First Name :: {firstName}

            </h2>

        </div>

    </div>

</template>
oneWayDataBinding.js
/*
* @description: one-way data binding
* @author: sfdc4u.com
*/
import { LightningElement,track } from 'lwc';

export default class InputText extends LightningElement {

    @track firstName ="Ajit Singh";

}
oneWayDataBinding.js-meta.xml
 <?xml version="1.0"?>

<LightningComponentBundle xmlns="http://soap.sforce.com/2006/04/metadata">

    <apiVersion>55.0</apiVersion>

    <isExposed>true</isExposed>

    <targets>

        <target>lightning__RecordPage</target>

        <target>lightning__AppPage</target>

        <target>lightning__HomePage</target>

    </targets>

</LightningComponentBundle>
Output:
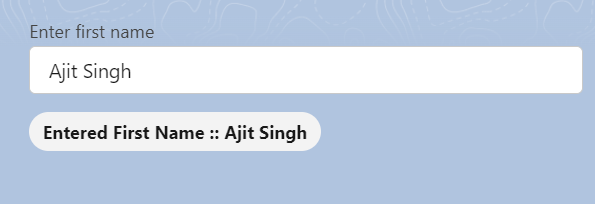
It uses the @track decorator to tell the LWC framework that our firstName property is reactive – i.e. that LWC should re-render the component when it changes.
In order to render this into our components HTML we use the {firstName} expression. If we test out this code we’ll see, nothing happened to{firstName} And that’s because we have only one way binding in LWC
Two-Way Data Binding
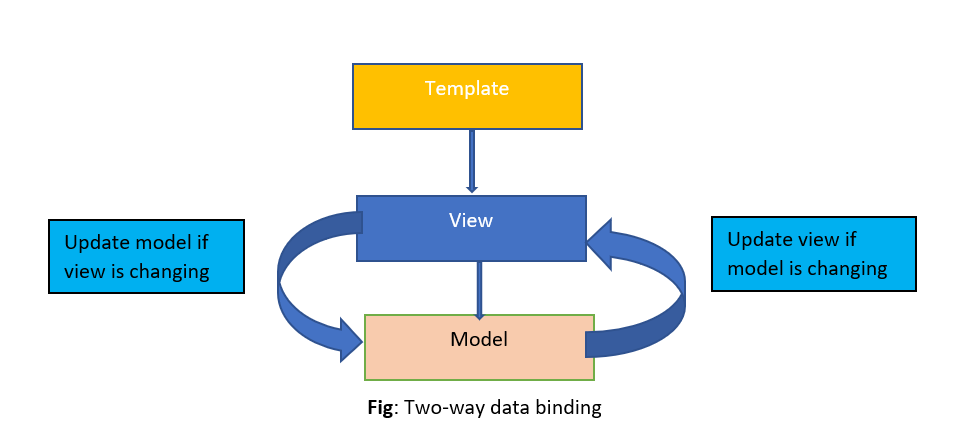
Key points to note here:
- Data always flows from model to view and view to model
- In case of any modification in the model, the same will sync up in view
- In case of any modification in view, the same will sync up in the model
In two way how do we get the changes to update the model? We need to add an event listener for that. So let’s try to make the above code as two-way by adding event listener.
Event Listeners are just standard DOM event listeners. There’s no custom syntax, or event object, it’s just pure Web Standards.
The only difference is that you can attach an event handler using the binding syntax of onsomeevent={eventHandlerFunction}. Let’s add an onkeydown event with a handler to our existing example:
twoWayBinding.html
<template>
    <div class="slds-m-top_medium slds-m-bottom_x-large">
        <h2 class="slds-text-heading_medium slds-m-bottom_medium">
            A text input field with an initial value.
        </h2>
        <div class="slds-p-around_medium lgc-bg">
            <lightning-input type="text" label="Enter first name" value={firstName} onkeydown={handlerChange}></lightning-input>
            <h2 class="slds-badge slds-m-top_small">
                Entered First Name :: {firstName}
            </h2>
        </div>
    </div>
</template>
twoWayBinding.js
/*
* @description: two way data binding
* @author: sfdc4u.com
*/
import { LightningElement,track } from 'lwc';

export default class App extends LightningElement {

    @track firstName ="Ajit Singh";

       handlerChange(event){

        this.firstName = event.target.value;

    }

}
Output:
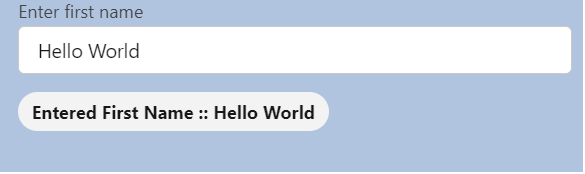
In the .html file of the component, we have added onkeydown listener to the input field and told it what function on our class to call when it’s fired.
Reference: Data Binding in LWC
Read more: Design attributes in LWC
1 thought on “Chapter 5: Data Binding in LWC”